Android instrumentation
The previous sections are dedicated to general instrumentation, specially in desktop operative systems. However, one of the strongest points of Frida is mobile instrumentation and this section is dedicated to its introduction.
Setting up the environment
Android emulator
To start instrumenting Android applications having an environment setup is key. The easiest way to have an environment setup is through Android's Studio which contains an Android emulator for testing applications. You can download the latest version for your operative system at: https://developer.android.com/studio
When Android Studio is installed, access the device manager:
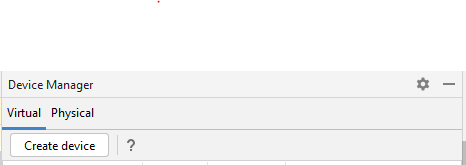
With the device manager open, select "Create Device" and choose a device of your choice.

The next step is to choose the Android operative system, as of now Frida works up to the latest Android version (Android 13) and that is the version used through these sections. You are free to use previous compatible versions.

Once the device is setup, run it and verify that you can get shell access by running adb shell in your command line. If you get a command line
to the emulator, you are good to go!
frida-server
The second requirement is to have a compatible frida-server available within our virtual machine. This allows Frida to connect via ADB/USB debugging to our Android device.
The latest frida-server can be downloaded from https://github.com/frida/frida/releases - Beware to download the version that matches your virtual device. If your emulator is a x84_64 download the matching version of the server. As of the time of this writing, this version is https://github.com/frida/frida/releases/download/15.1.27/frida-server-15.1.27-android-x86_64.xz.
Once the file is downloaded, extract it and push it to your virtual device via ADB: adb push frida-server /data/local/tmp/
Then, use adb root to restart ADB in root mode and regain shell access via adb shell. Once in the shell go to the directory we placed frida-server and
give it execution permissions:
cd /data/local/tmp/ followed by chmod +x frida-server.
To leave it running in the background, simply execute: ./frida-server & and the shell can be closed. Of course, running applications in an emulator might other trigger emulation detection mechanisms but it should be cover enough for this section.
Java API
When instrumenting Android's applications Frida has a very powerful API called the Java API. This API allows instrumenting processes that have the Java VM loaded: Dalvik or ART.
This Java API must not be invoked for non ART/Dalvik processes because it is not ready for other VMs thus making this API an Android exclusive one.
The two most used method of the Java API is .perform and its counterpart .performNow. The next sections are dedicated to the .perform() API with various examples of its usage.
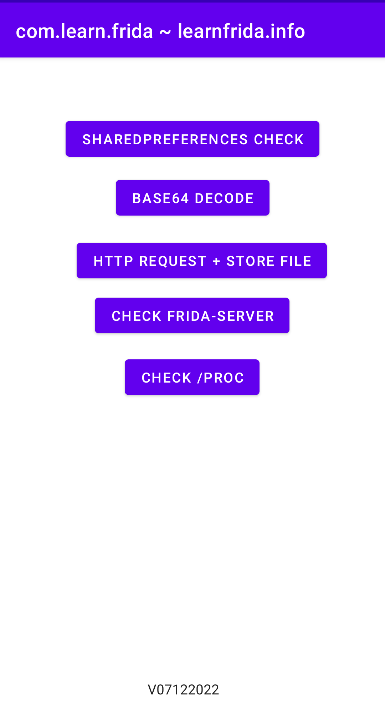
I believe that practical learning is a good approach in this topic so all the examples are done under a demo application that can be found in the following repository: https://github.com/azurda/com.learn.frida. This app is a dummy one written in Kotlin that has buttons for each section. Buttons trigger the code block they are assigned by .onClick (and the code can be read). Once the application is running, you should see the following screen:
Java.perform() API
The Java.perform API depends on calling resume() to complete which might avoid instrumentation on the application startup stage. To avoid this, use the Java.performNow().
Instrumenting Android applications
If you have not read the set-up part, please refer to it and ensure that frida-server is already running on your Android emulator.
Instrumenting Android applications is slightly different from instrumenting applications in desktop OS's. Most of the skills translate to Android instrumentation with the slight difference of the Java API. The Java API is a built-in module and allows interoperatibility with the Java runtime.
The most important differences from previous content are:
- Instrumenting applications from Frida's CLI requires the -U parameter that stands for USB. For example,
frida -U com.learn.frida. - To find the PID of the process or the name, the
frida-psaccepts the-Uparameter too. - The Java API is available.
To verify that your setup is running, open the demo application of this handbook and try to instrument it:
frida -U learnfrida
From there, you can call the Java.available API to verify that it is indeed attached to an ART/Dalvik process. This is the output that should prompt:
[Android Emulator 5554::learnfrida ]-> Java.available
true
Also, the Java API provides even more detailed info of the instrumented process. When typing Java in the REPL, we get a lot more information:
{
    "_apiError": null,
    "_cachedIsAppProcess": null,
    "_initialized": true,
    "_pendingMainOps": [],
    "_pendingVmOps": [],
    "_pollListener": null,
    "_wakeupHandler": null,
    "api": {
        "$delete": "0xe6b51ec0",
        "$new": "0xe6b51d60",
        "JNI_GetCreatedJavaVMs": "0xe4152770",
        "addLocalReference": null,
        "art::ClassLinker::VisitClassLoaders": "0xe3f3f2e0",
        "art::ClassLinker::VisitClasses": "0xe3f3f390",
        "art::Dbg::SetJdwpAllowed": "0xe3f98340",
        "art::Instrumentation::Deoptimize": "0xe40aba40",
        "art::Instrumentation::DeoptimizeEverything": "0xe40accf0",
        "art::Instrumentation::EnableDeoptimization": "0xe40ac350",
        "art::JavaVMExt::AddGlobalRef": "0xe414cad0",
        "art::Monitor::TranslateLocation": "0xe4280060",
        "art::ReaderWriterMutex::ExclusiveLock": "0xe3f1c300",
        "art::ReaderWriterMutex::ExclusiveUnlock": "0xe3f1c5d0",
        "art::Runtime::DeoptimizeBootImage": "0xe4391380",
        "art::StackVisitor::GetMethod": "0xe43ae730",
        "art::StackVisitor::StackVisitor": "0xe43af910",
        "art::StackVisitor::WalkStack": "0xe43ad3c0",
        "art::Thread::CurrentFromGdb": "0xe43f6690",
        "art::Thread::DecodeJObject": "0xe43eef90",
        "art::Thread::GetLongJumpContext": "0xe43f7860",
        "art::ThreadList::ResumeAll": "0xe44085c0",
        "art::ThreadList::SuspendAll": "0xe4407e30",
        "art::interpreter::GetNterpEntryPoint": "0xe44fd1b0",
        "art::jni::JniIdManager::DecodeMethodId": "0xe4157dd0",
        "art::mirror::Class::GetDescriptor": "0xe4258050",
        "artClassLinker": {
            "address": "0xe9c01110",
            "quickGenericJniTrampoline": "0x7001d030",
            "quickImtConflictTrampoline": "0x7001d040",
            "quickResolutionTrampoline": "0x7001d050",
            "quickToInterpreterBridgeTrampoline": "0x7001d060"
        },
        "artHeap": "0xea043010",
        "artInstrumentation": "0xe3b408e8",
        "artNterpEntryPoint": "0x0",
        "artQuickGenericJniTrampoline": "0xe3e87260",
        "artQuickToInterpreterBridge": "0xe3e87340",
        "artRuntime": "0xe3b40750",
        "artThreadList": "0xe3b84330",
        "flavor": "art",
        "module": {
            "base": "0xe3d45000",
            "name": "libart.so",
            "path": "/apex/com.android.art/lib/libart.so",
            "size": 8183808
        },
        "vm": "0xdc3c1960"
    },
    "classFactory": {
        "_classHandles": {
            "capacity": 10,
            "items": {}
        },
        "_classes": {},
        "_loader": null,
        "_patchedMethods": {},
        "_types": [
            {},
            {}
        ],
        "cacheDir": "/data/local/tmp",
        "codeCacheDir": "/data/local/tmp/dalvik-cache",
        "tempFileNaming": {
            "prefix": "frida",
            "suffix": ""
        }
    },
    "vm": {
        "handle": "0xdc3c1960"
    }
}
Reading values
The first and most important thing is to learn how to use the Java API to read method arguments and return values. For this example, the button sharedPreferences check of the demo application is used. This is the relevant bit of Kotlin code for this section:
btn_sharedprefs.setOnClickListener {
            val sharedPreferences = this.getPreferences(Context.MODE_PRIVATE)
            val stringValue = sharedPreferences.getString(R.string.savedString.toString(), "foobarstring")

            if (stringValue == "foobarstring") {
                Toast.makeText(this, "Instrumentation is not correct.", Toast.LENGTH_SHORT).show()
            } else {
                Toast.makeText(this, "Instrumentation OK!", Toast.LENGTH_SHORT).show()
            }
        }
As it can be seen, the application is invoking a Toast message depending on the value of the string "savedString" from the local sharedPreferences file. If this value is not set, it will default to foobarstring. Our first task is to instrument the function getString() from sharedPreferences and read the default value.
To instrument the .getString() method we need to first identify which class it belongs to and in this case it belongs to android.app.SharedPreferencesImpl. The next step is figuring out the argument types that it receives which in this case both are Java strings and so their type is java.lang.String. With this information it is now possible to instrument this method with the following instrumentation code:
Java.perform(() => {
    const sharedPreferences = Java.use('android.app.SharedPreferencesImpl');
    sharedPreferences.getString.overload('java.lang.String', 'java.lang.String').implementation = (value, defaultvalue) => {
        console.log("on_enter parameters", value, defaultvalue);
        const returnedString = this.getString(value, defaultvalue);
        console.log("returnedString", returnedString);
        return returnedString;
    };
});
Looks different from or previous instrumentation in desktop systems, right? No worries, let's explain it step by step. The Java.perform block ensures that the current thread is attached to the ART VM and afterwards it will run the function contained within. Java.use is used to obtain a Javascript wrapper for the specified class and with it, it is possible to instrument the method getString:
sharedPreferences.getStringindicates the method to instrument.overloadoverloads the argument types allowing us to instrument the correct implementation of the getString method. This is very important when the are methods with the same name but different implementations.- The function () => {} receives the parameters specified in the overload.
Within the function body contents, we print the values of value and defaultvalue. The next step is to call the original method using the received parameters value and defaultavalue and storing the return value on the returnedString value and then we log it in the console.
Now, to instrument this function:
frida -U learnfrida -l android_ins.js
And when pressing the sharedPreferences button we get:
[Android Emulator 5554::learnfrida ]-> on_enter parameters 2131689593 foobarstring
returnedString foobarstring
Replacing return values
Another useful thing to do is to replace return values, this allows the user to manipulate the contents of the returned methods and modify the control flow directly. However, unlike in the previous this time it is not as straightforward to work with the different data-types. To demonstrate this the next task is to modify the return value of the getString() to a string different from foobarstring.
When replacing the return value, the return value is indeed a string. But it is a Java string. To replace the data-type correctly it is neccessary to replace it with the same object. To achieve this the following steps are required:
- Obtain a the JS wrapper of the Java String class.
- Instantiate a String object with our string of choice
- Replace the value.
That sounds nice right? But how do you do that?! The answer is by using again the Java.use API:
Java.perform(() => {
    const stringCls = Java.use('java.lang.String');
    const newString = stringCls.$new("learnfrida!");
    const sharedPreferences = Java.use('android.app.SharedPreferencesImpl');
    sharedPreferences.getString.overload('java.lang.String', 'java.lang.String').implementation = function (value, defaultvalue) {
        console.log("on_enter parameters", value, defaultvalue);
        console.log("newString:", newString.toString());
        return newString;
    };
});
As you can see, stringCls is Frida's JS wrapper of Java's String class. By $new using the stringCls class we invoke the creation of a new instance with our desired string of choice. Finally, we return the string newString that we allocated.
It is important to be aware of the data-types that are being replaced or read because allocating strings using Frida's Memory.writeUtf8String would have been fatal.
Replacing arguments
With the previous example it was possible to validate our check. However, the original file MainActivity.xml in /data/data/com.learn.frida/shared_prefs/ is still storing the foobarstring value. This can be solved by instrumeting a different method from SharedPreferencesImpl$EditorImpl: putstring(String key, String value).
putString receives two values, first the key to write to and second the value to write to the chosen key. Our goal is to write the string with the value learnfrida!. To achieve this, first we need to instrument the putString function:
const sharedPreferencesEditor = Java.use("android.app.SharedPreferencesImpl$EditorImpl");
sharedPreferencesEditor.putString.overload('java.lang.String', 'java.lang.String').implementation = function(key, value) {
    // CODE GOES HERE
}
Both argument types are Java strings, therefore to replace the value of the second argument we'll reuse the previous allocated string newString:
    sharedPreferencesEditor.putString.overload('java.lang.String', 'java.lang.String').implementation = function(key, value) {
        return this.putString(key, newString);
    }
When executing this.putString it calls the original putString method but this time with our values of choice: The same key and a user-allocated string. Let's try this:
frida -U -f com.learn.frida -l android_ins.js --no-pause
putString is called on the application startup so this time we are using the switch -f to allow the application spawn. If executed sucessfully, we can now head to the application's shared preferences and verify its contents:
generic_x86:/data/data/com.learn.frida/shared_prefs # cat MainActivity.xml
<?xml version='1.0' encoding='utf-8' standalone='yes' ?>
<map>
    <string name="foobarstring">learnfrida!</string>
</map>
Awesome! The value of foobarstring has been replaced with learnfrida!!
Instrumenting constructors
Constructors might hold information that is of great interest to us and that are cannot be accessed by instrumenting methods within the class. An example of this behaviour is the URL class where the URL is created on the constructor initialization. To instrument constructors, the $init keyword is used to overload the constructor. Do not confuse it with $new which was used to create a new instance of the class at will.
For this example, the second button called http request uses Java.net.URL to create an URL object and perform a GET request to read the response contents. The URL is passed to java.net.URL's constructor, and this is our instrumentation target.
Java.perform(() => {
    const URL = Java.use("java.net.URL");
});
Within Java.perform() the URL class wrapper for java.net.URL is retrieved. The next step is to instrument the constructor and log the URL:
Java.perform(() => {
    const URL = Java.use("java.net.URL");
    URL.$init.overload('java.lang.String').implementation = function(val) {
        console.log(val);
        return this.$init(val);
    };
});
The $init keyword indicates that the method to overload is the constructor itself and the one that receives a Java String as its unique parameter. Once this is done, it is possible to instrument the value by logging to the REPL and then returning the original call via this.$init(val). When doing this, the following output is obtained:
Spawned `com.learn.frida`. Resuming main thread!
[Android Emulator 5554::com.learn.frida ]-> <class: java.net.URL>
<class: java.net.URL>
Previous examples demonstrate to intercept method parameters and return values, as well as how to replace them. In these situations, we were accessing a method of an already existing class which. But, what happens when the important bits of information are stored within the constructor?
Bytearray values
A common pattern due to how JVM methods are usually designed is that they returned arrays of bytes or byte[]. To learn how to handle this data-type, the button base64 decode is available in the demo app.
The .decode() function is present within java.util.Base64 class and to be able to instrument it we need a wrapper to getDecoder(). Thus, our target wrapper for Java.use becomesjava.util.Base64$Decoder. The next step is figuring out the data-type of the function which in this case it receives a bytearray as argument. In Frida these bytearrays are represented as [B when overloading the data-type.
With this information it is now possible to procceed to instrumentation. Here is the basic skeleton to instrument this method:
// frida -l ins.js -U learnfrida --no-pause
Java.perform(() =>{
const b64Claz = Java.use('java.util.Base64$Decoder');
    b64Claz.decode.overload('[B').implementation = function (inputString) {
        const retval = this.decode(inputString);
        console.log(inputString);
        console.log(typeof(retval), retval);
        return retval;
    }
});
Notice how the overload receives a single [B parameter. This is what was previously indicated as the representation of a bytearray data-type.
When instrumenting and pressing the Base64 button Frida's REPL returns the following output:
 83,83,66,111,98,51,66,108,73,72,108,118,100,83,66,104,99,109,85,103,97,71,70,50,97,87,53,110,73,71,90,49,98,105,66,51,97,88,82,111,73,69,90,121,97,87,82,104,73,81,61,61
object 73,32,104,111,112,101,32,121,111,117,32,97,114,101,32,104,97,118,105,110,103,32,102,117,110,32,119,105,116,104,32,70,114,105,100,97,33
The first set of bytes corresponds the input that the method .decode() receives and the second line is the result after calling the function, which is the string to decode. Of course, both of these strings are not really useful for us the way they are now. To get meaningful data the best options are either using an external tool or just do the conversion right within our script. Let's do the later option!
Java.perform(() =>{
const b64Claz = Java.use('java.util.Base64$Decoder');
    b64Claz.decode.overload('[B').implementation = function (inputString) {
        const retval = this.decode(inputString);

        let asciiInputString = []
        for(let i = 0; i < inputString.length; i++) {
            asciiInputString.push(String.fromCharCode(inputString[i]));
        }
        console.log(asciiInputString.join(""));
        let asciiOutputString = []
        for(let i = 0; i < retval.length; i++) {
            asciiOutputString.push(String.fromCharCode(retval[i]));
        }
        console.log(asciiOutputString.join(""));
        return retval;
    }
});
After iterating each value of the Object representing the bytearray we get the following output:
[Android Emulator 5554::learnfrida ]->
SSBob3BlIHlvdSBhcmUgaGF2aW5nIGZ1biB3aXRoIEZyaWRhIQ==
I hope you are having fun with Frida!
And this has succesfully instrumented the function and retrieved meaningful data from the original bytearray.
Warning
Be careful when operating with ByteArray data. In this example, we were sure that converting these bytes to chars would return a human readable string for both the argument and the return value. If the data behind handled are not ASCII characters but binary data instead this solution would likely not work as intended.
Method overloads
When operating with the .decode method we chose the overload [B and in other examples java.lang.String with as many values as arguments. Although it was mentioned that the overload method is to choose which implementation to instrument, lets inspect it with Frida.
When trying to instrument the .decode function calling .implementation directly with no overloads, Frida shows an error:
[Android Emulator 5554::learnfrida ]-> b.decode.implementation
Error: decode(): has more than one overload, use .overload(<signature>) to choose from:
        .overload('java.nio.ByteBuffer')
        .overload('java.lang.String')
        .overload('[B')
        .overload('[B', '[B')
This means that Frida is unaware of which method to instrument and needs the specific implementation. In the previous case the .decode method received a []byte argument and returned a value of the same type. Frida lists the overloads that it has detected and indicates the correct combinationn, so in the previous scenario that would be the .overload('[B').
This method is also commonly called with a string instead, to instrument that implementation the correct way would be to overload thue one with a single String which would be .overload('java.lang.String').
Stacktraces
Sometimes to save time on instrumentation a good idea is to obtain a trace of what was called prior to our current trace. This can help to identify other interesting functions to instrument and code paths without requiring static analysis. The base64 button is again the example to study this on.
The skeleton for getting the stacktrace of the implementation is as follows:
Java.perform(() =>{
    const thread = Java.use('java.lang.Thread').$new();

    const b64Claz = Java.use('java.util.Base64$Decoder');
        b64Claz.decode.overload('[B').implementation = function (inputString) {
            const retval = this.decode(inputString);
            const stacktrace = thread.currentThread().getStackTrace();
            return retval;
        }
});
The first requirement is to get an instanced Thread object by using java.lang.Thread's wrapper and then invoking $new() to create an instance of it. With the thread object, it is now possible to call its methods including the current thread's stack trace via .getStackTrace(). This stacktrace is returned as a list thus the output needs postprocessing, the simple way to achieve this is by iterating and printing it via .forEach:
Java.perform(() =>{
    const thread = Java.use('java.lang.Thread').$new();

const b64Claz = Java.use('java.util.Base64$Decoder');
    b64Claz.decode.overload('[B').implementation = function (inputString) {
        const retval = this.decode(inputString);
        const stacktrace = thread.currentThread().getStackTrace();
        stacktrace.forEach( (element) => {
            console.log(element);
        });
        return retval;
    }
});
After instrumenting the application and pressing the button Frida's REPL prints the following output:
[Android Emulator 5554::learnfrida ]-> dalvik.system.VMStack.getThreadStackTrace(Native Method)
java.lang.Thread.getStackTrace(Thread.java:1736)
java.util.Base64$Decoder.decode(Native Method)
com.learn.frida.MainActivity.onCreate$lambda-3(MainActivity.kt:72)
com.learn.frida.MainActivity.$r8$lambda$b7XbkR9rj5AI57kvCCFslXJKa7Q(Unknown Source:0)
com.learn.frida.MainActivity$$ExternalSyntheticLambda0.onClick(Unknown Source:2)
android.view.View.performClick(View.java:7448)
com.google.android.material.button.MaterialButton.performClick(MaterialButton.java:1194)
android.view.View.performClickInternal(View.java:7425)
android.view.View.access$3600(View.java:810)
android.view.View$PerformClick.run(View.java:28305)
android.os.Handler.handleCallback(Handler.java:938)
android.os.Handler.dispatchMessage(Handler.java:99)
android.os.Looper.loop(Looper.java:223)
android.app.ActivityThread.main(ActivityThread.java:7656)
java.lang.reflect.Method.invoke(Native Method)
com.android.internal.os.RuntimeInit$MethodAndArgsCaller.run(RuntimeInit.java:592)
com.android.internal.os.ZygoteInit.main(ZygoteInit.java:947)
As it can be seen, the provided information is indeed very valuable (despite our controlled simple example). What can be observed from the StackTrace is that the event that triggered the call is .onClick within onCreate and then our instrumented function was called.
Frida detection mechanisms
It is common to find applications that prevent instrumentation for various reasons. This prevents the user from easily instrumenting the target application however, it is possible to workaround these measures with enough analysis. Keep in mind that the measures mentioned in these pages are few and there are lots of more ways to detect instrumentation.
/data/local/tmp/frida-server
Whenever an user searches about how to use Frida on Android most of the resources suggest pushing frida-server to /data/local/tmp/frida-server. This is found in the official documentation, blogposts and trainings which means that if someone is instrumenting using frida-server the application will likely find it there.
For this scenario there are buttons in the com.learn.frida application that interact with JNI to detect Frida. This check runs the following JNI code in the background:
extern "C"
JNIEXPORT jboolean JNICALL
Java_com_example_myapplication_MainActivity_isFridaRunning(JNIEnv *env, jobject thiz) {
    int result;
    struct stat sb;
    if (stat("/data/local/tmp/frida-server", &sb) == 0)
    {
        return true;
    }

    return false;
}
Simple, isn't it? In this case the way to work around this is to replace calls of stat that are pointing to our application and redirect them to a new path. This can be done as follows:
const pathString = Memory.allocUtf8String("/data/local/tmp/foobar-server");

Interceptor.attach(Module.getExportByName(null, 'stat'), {
    onEnter(args) {
        if(args[0].readUtf8String().includes('frida')) {
            args[0] = pathString;
        }
    }
});
Whenever stat is called, the string verifies that the frida string is included within the path the it is redirected to stat over /data/local/tmp/foobar-server instead. Of course, an easier workound is to change the name of the binary.
/proc/self/maps
Another common check is verifying /proc/self/maps which includes the region of continuous virtual memory of the process. These descriptions include addresses, paths, permissions, offsets... But the most important thing to us is that it includes strings related to Frida. For this example the button Check /proc/ is used.
The aforementioned button calls the following JNI routine:
extern "C"
JNIEXPORT jboolean JNICALL
Java_com_example_myapplication_MainActivity_isFridaProc(JNIEnv *env, jobject thiz) {
    FILE *fp;
    char line[512] = {0};
    fp = fopen("/proc/self/maps", "r");
    if (fp)
    {
        while(fgets(line, 512, fp))
        {
            if (strstr(line, "frida"))
            {
                return true;
            }
        }
    }
    return false;
}
The function opens the /proc/self/maps file and then starts reading its contents. If by any chance it finds the string frida in the contents then it will return true and detect Frida's instrumentation. But there is a dangerous caveat when instrumenting the strstr function and that is it can be used by a wide number of calls be it from the application itself or internal. To avoid slowing down the application or making it unstable, the best approachu is to only instrument the strstr function whenever fopen is called towards /proc/self/maps.
Interceptor.attach(Module.getExportByName(null, 'fopen'), {
    onEnter(args) {
        this.strstr = null;
        if (args[0].readUtf8String() == "/proc/self/maps")
        {
            this.strstr = Interceptor.attach(Module.getExportByName(null, 'strstr'), {
                onEnter(args) {
                    this.arg_1 = args[0].readUtf8String();
                },
                onLeave(retval) {
                    if (this.arg_1.includes('frida'))
                    {
                        retval.replace(0);
                    }
                }
            });
        }
    },
    onLeave(retval) {
        if (this.strstr)
        {
            this.strstr.detach();
        }
    }
});
After seeing the code, let's explain it step by step. First, the fopen function is instrumented and checked for the /proc/self/maps string, when this tring is detected then the strstr function is instrumented to replace the return value ONLY IF the argument includes the frida string. this.strstr includes the InterceptorListener that is shared with fopen's onLeave to call detach() and stop instrumenting strstr after it is needed.
If everything went OK, the application displays a toast indicating that the instrumentation was not detected. Again, beware that this is a very simple example and it with enough creativity the complexity increases, but this is a good example of instrumenting interaction with JNI while maintaining a good performance.